Setting Up the Hardware Kit
In this lab we have experimented on the built in IMU, microphone and OLED display. We setup micro SD card for datalogging and RTC. At the end we used buzzer and connected to mobile with bluetooth nas well.
Introduction
We programmed our microcontroller for experimenting its sensors and connectivity using the example sketch provided in the arduino files. We have downloaded “Seeed_Arduino_LSMDS3”, “u8g2 library”, “PCF8563”, and “ArduinoBLE” Arduino libraries to complete this lab.
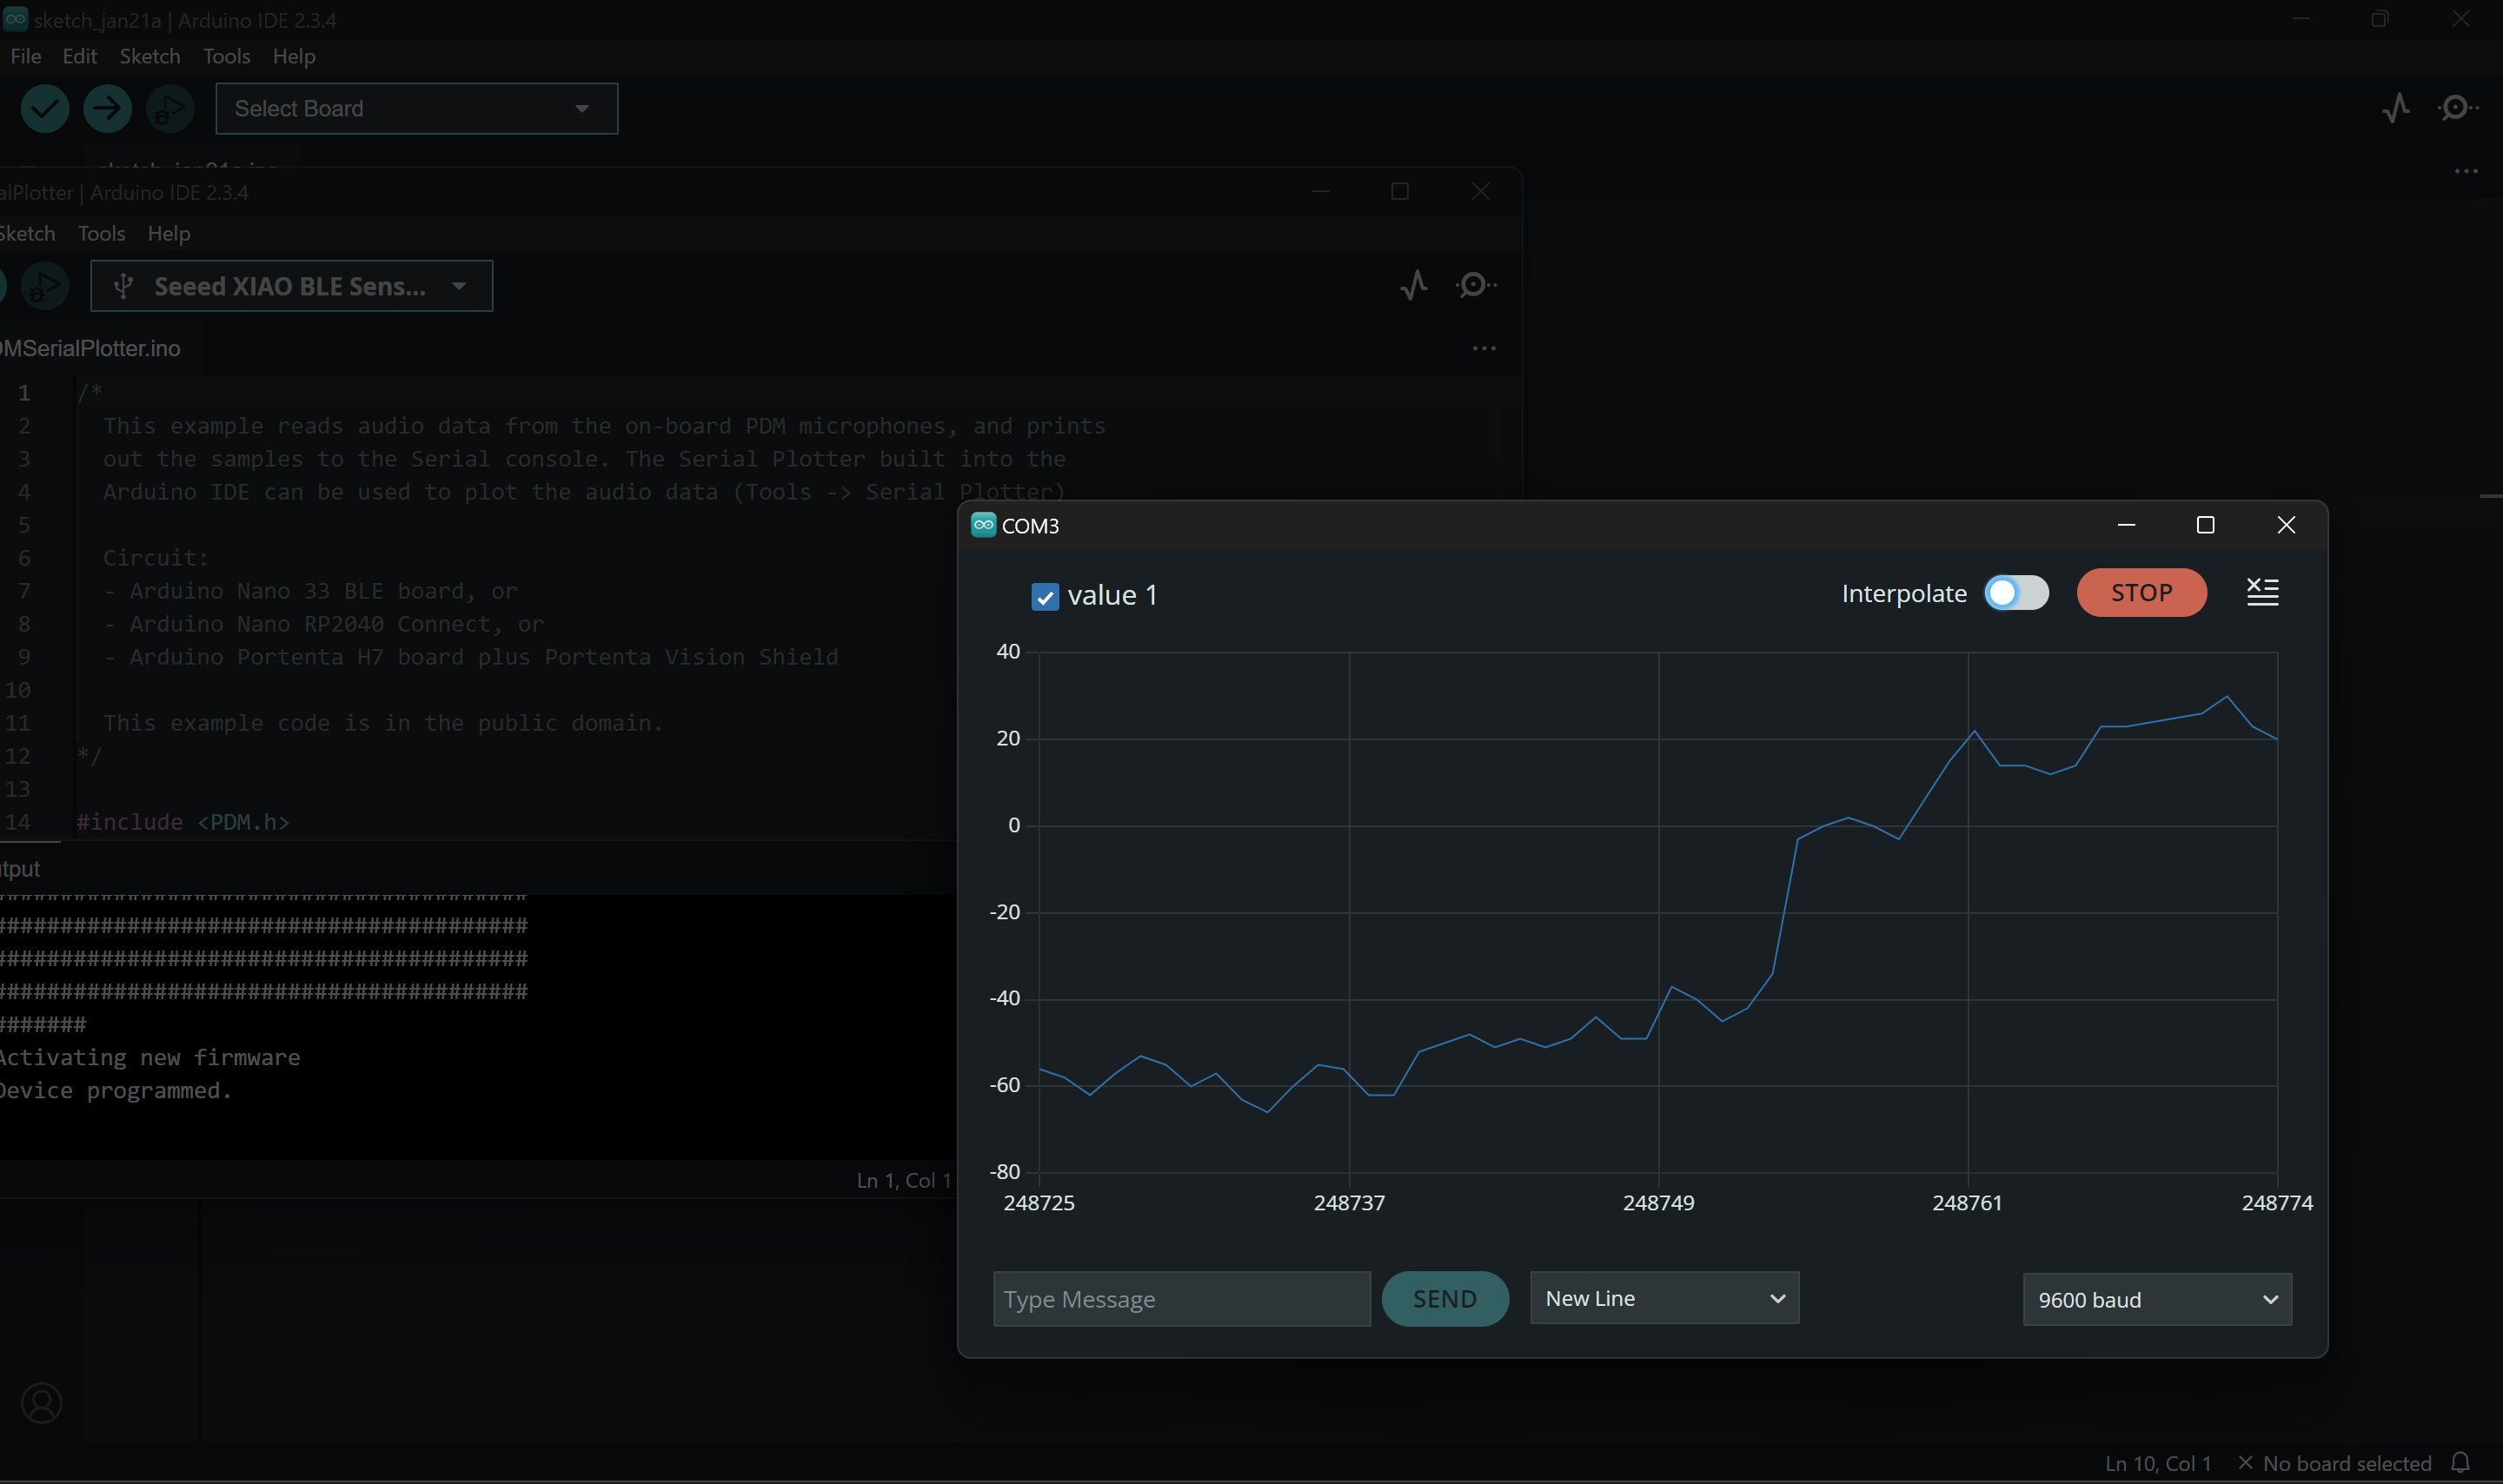
0. Built-in IMU and Microphone
We have collected accelerometer, gyroscope, and temperature data from the built-in IMU sensors and it was printed to the serial monitor.
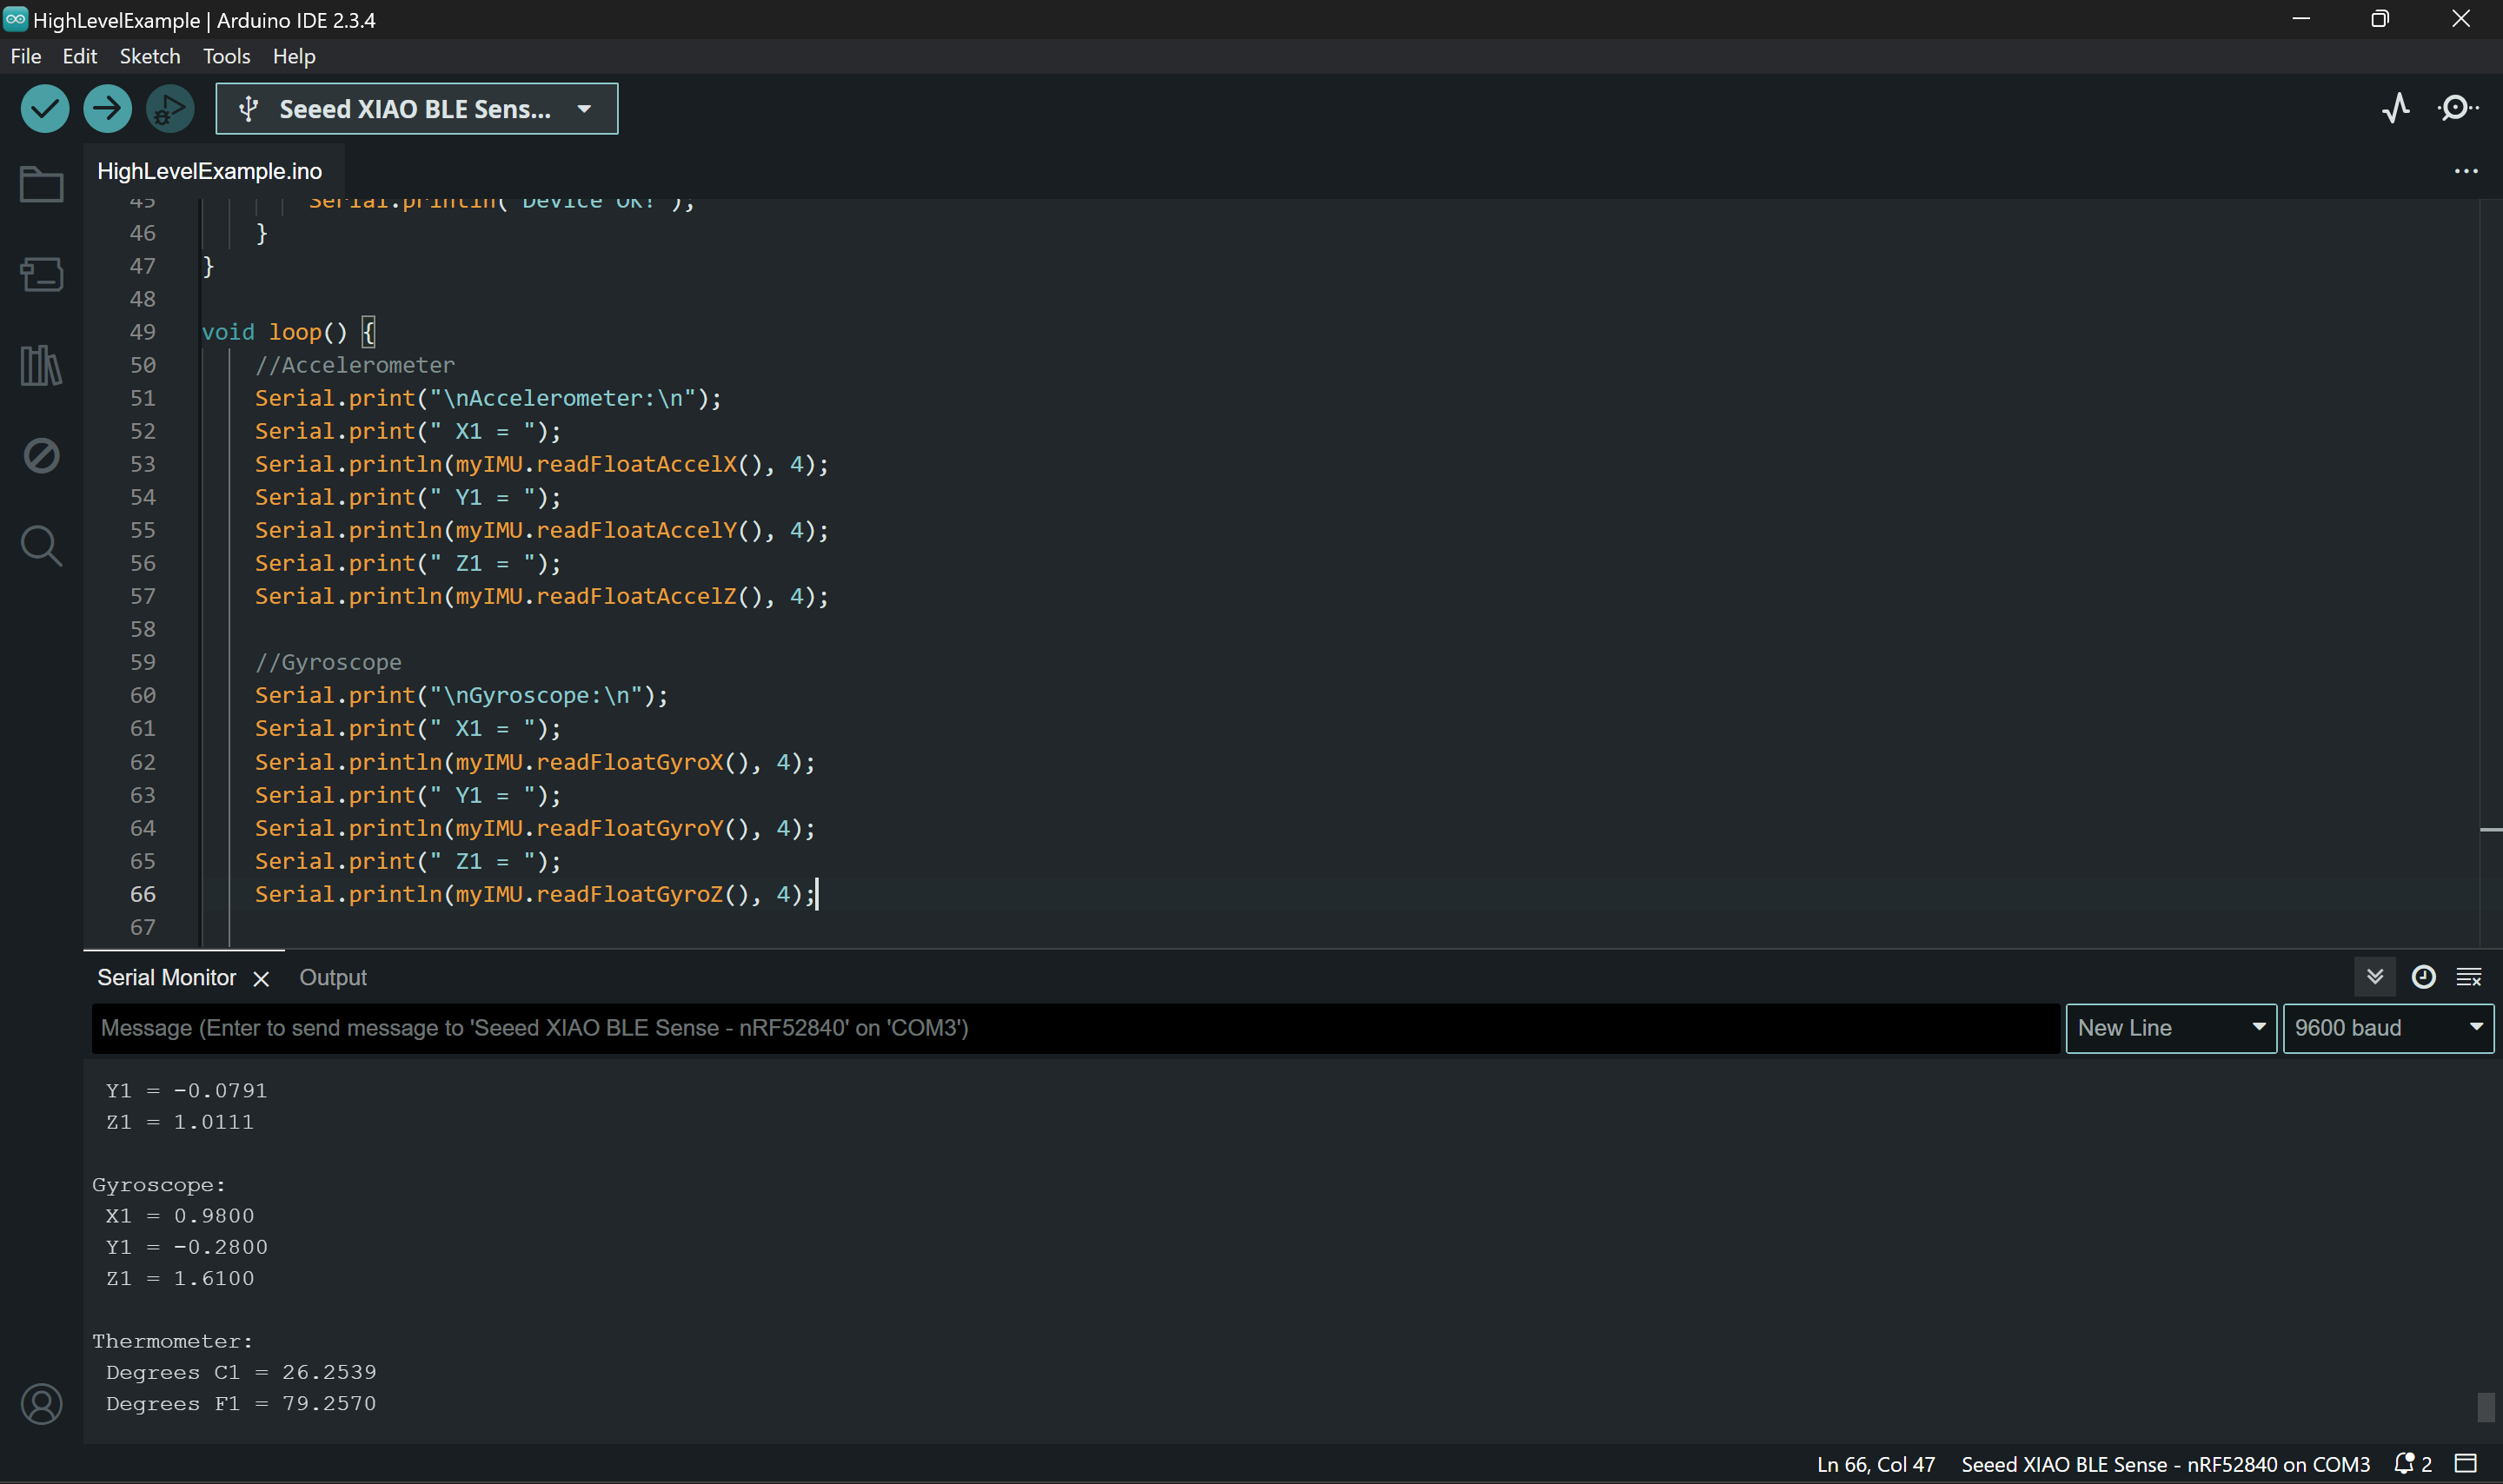
Using the seial plotter we were able to visualize the signal.
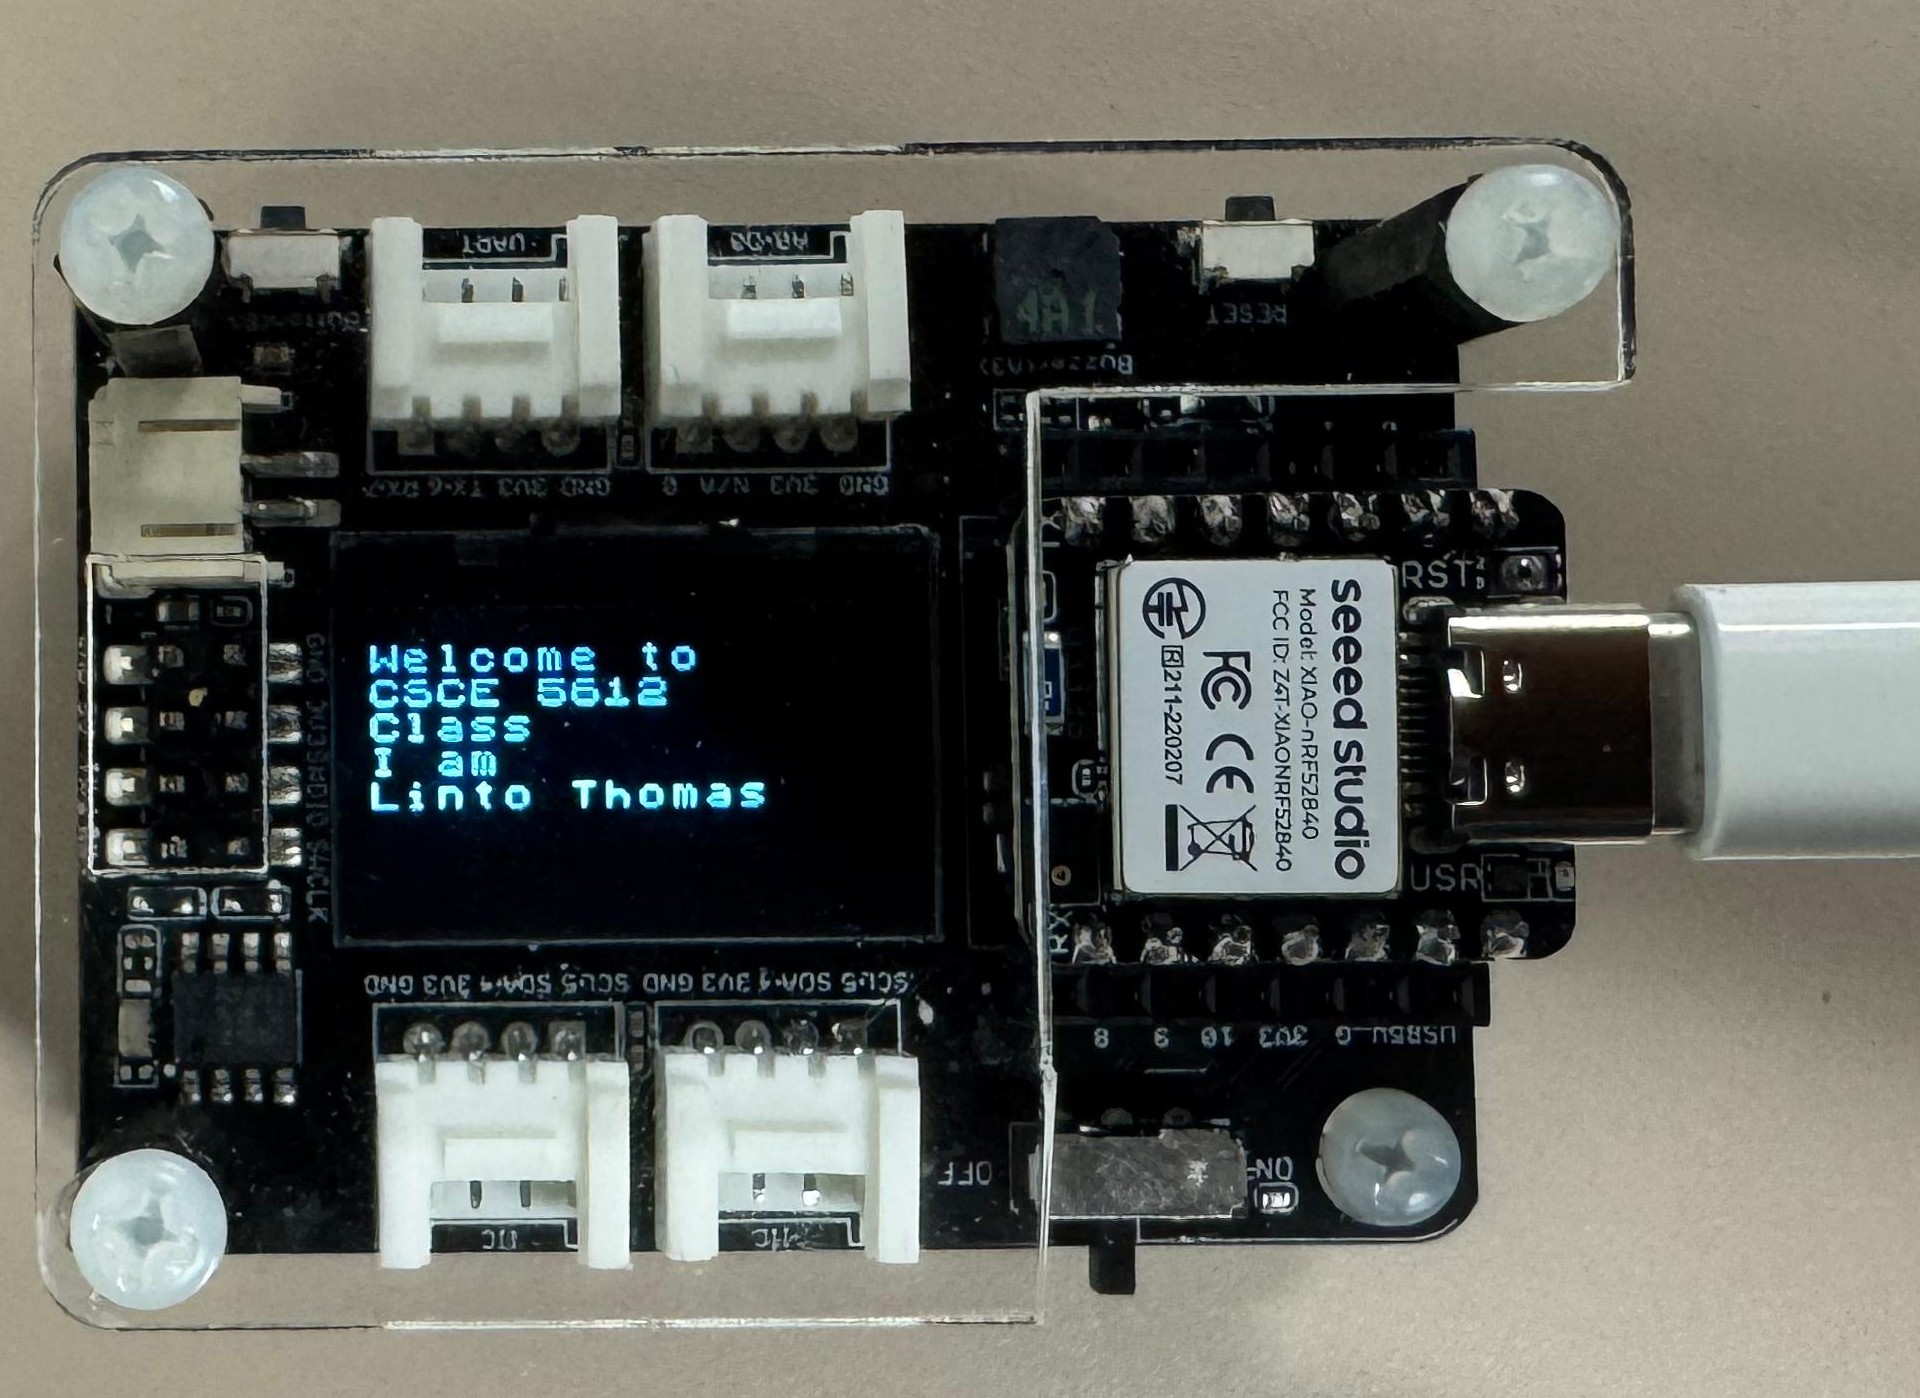
1. OLED Display
Using the code given below we displayed our name on the OLED screen of microcontroller.
#include <Arduino.h>
#include <U8x8lib.h> //Display library
#include <Wire.h> //I2C protocol library (the display uses I2C to interact with MCU)
U8X8_SSD1306_128X64_NONAME_HW_I2C u8x8(/* clock=*/ PIN_WIRE_SCL, /* data=*/
PIN_WIRE_SDA, /* reset=*/ U8X8_PIN_NONE); // OLEDs without Reset of the Display
void setup(void) {
u8x8.begin();
u8x8.setFlipMode(1); // set number from 1 to 3, the screen word will rotary 180
}
void loop(void) {
u8x8.setFont(u8x8_font_chroma48medium8_r); //try u8x8_font_px437wyse700a_2x2_r
u8x8.setCursor(0, 0); // It will start printing from (0,0) location
u8x8.print("Welcome to");
u8x8.setCursor(0, 1); // (columns, row)
u8x8.print("CSCE 5612");
u8x8.setCursor(0, 2);
u8x8.print("Class");
u8x8.setCursor(0, 3);
u8x8.print("I am");
u8x8.setCursor(0, 4);
u8x8.print("Linto Thomas");
}
2. MicroSD Card

Datalogger example from arduino library continuously log data to SD card from analog pins 0, 1, and 2. Some changes need to be done before that, since We use the SPI protocol to interact (read/write) with SD cards. SPI hardware setup includes a chip select line. The chip select of the SD card is connected to Pin 2 of the microcontroller. Therefore, we need to set the chip select accordingly (const int chipSelect = 2;).
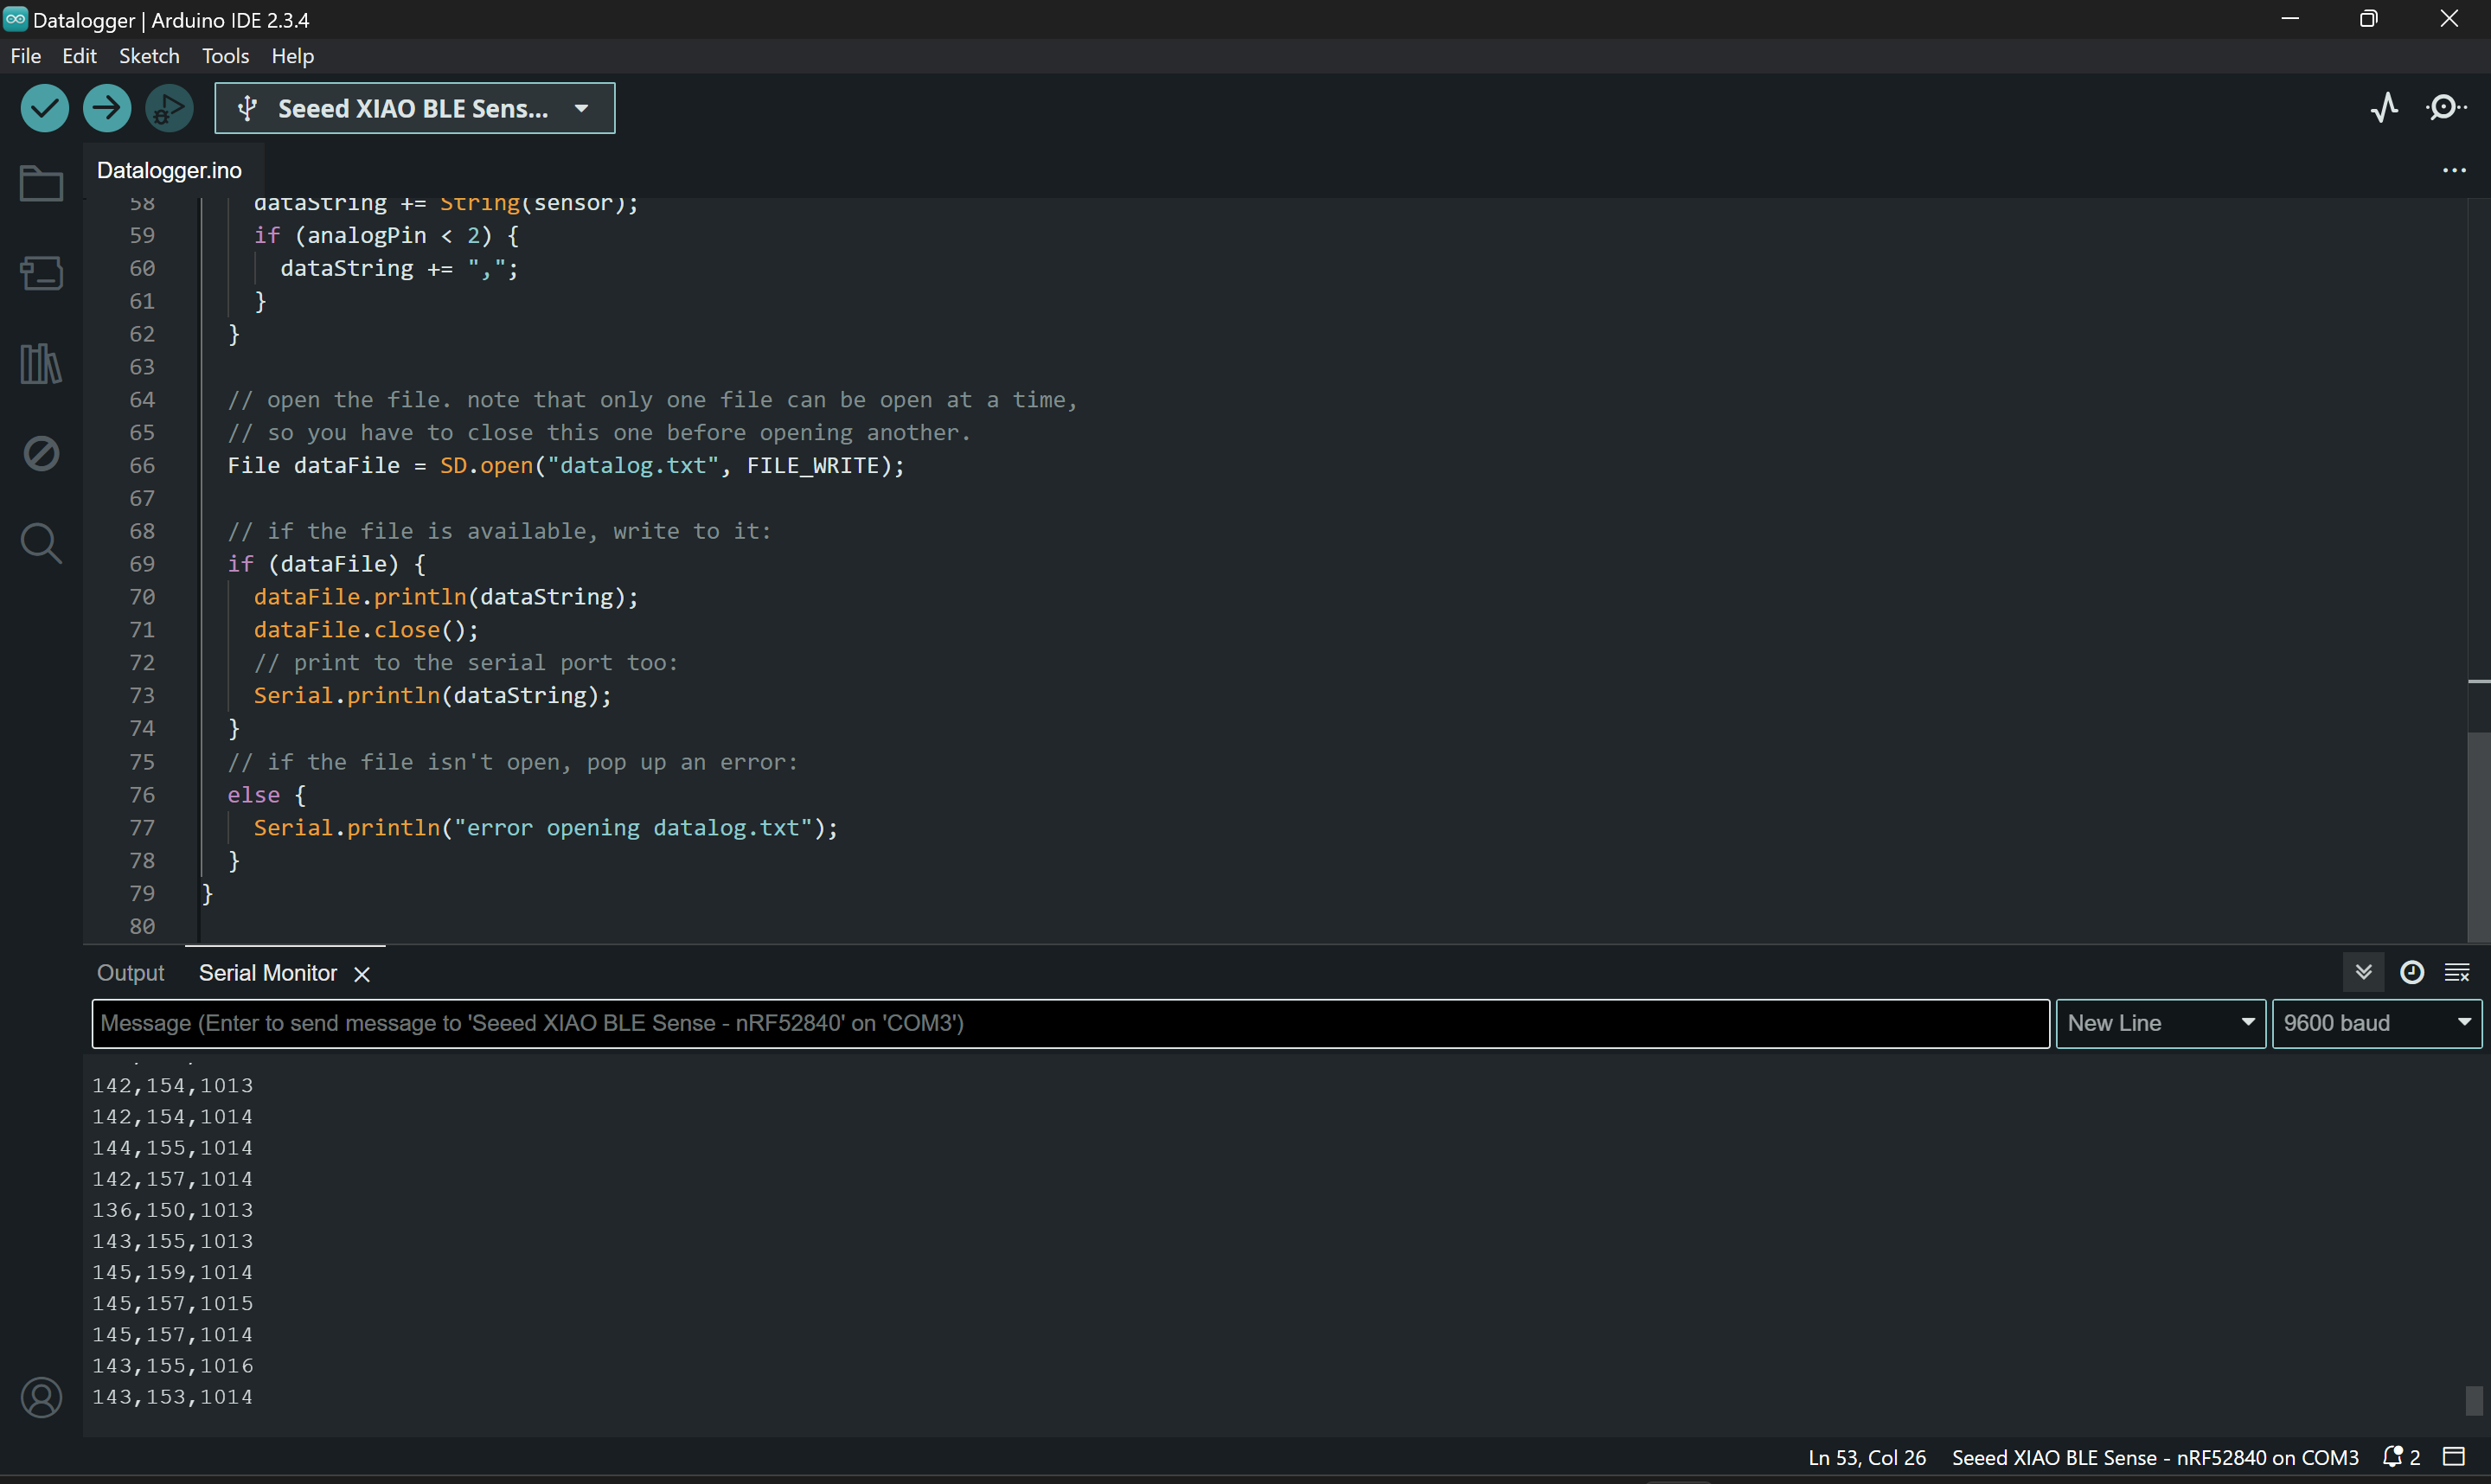
Collected text file stored in the SD card can be accessed from here.
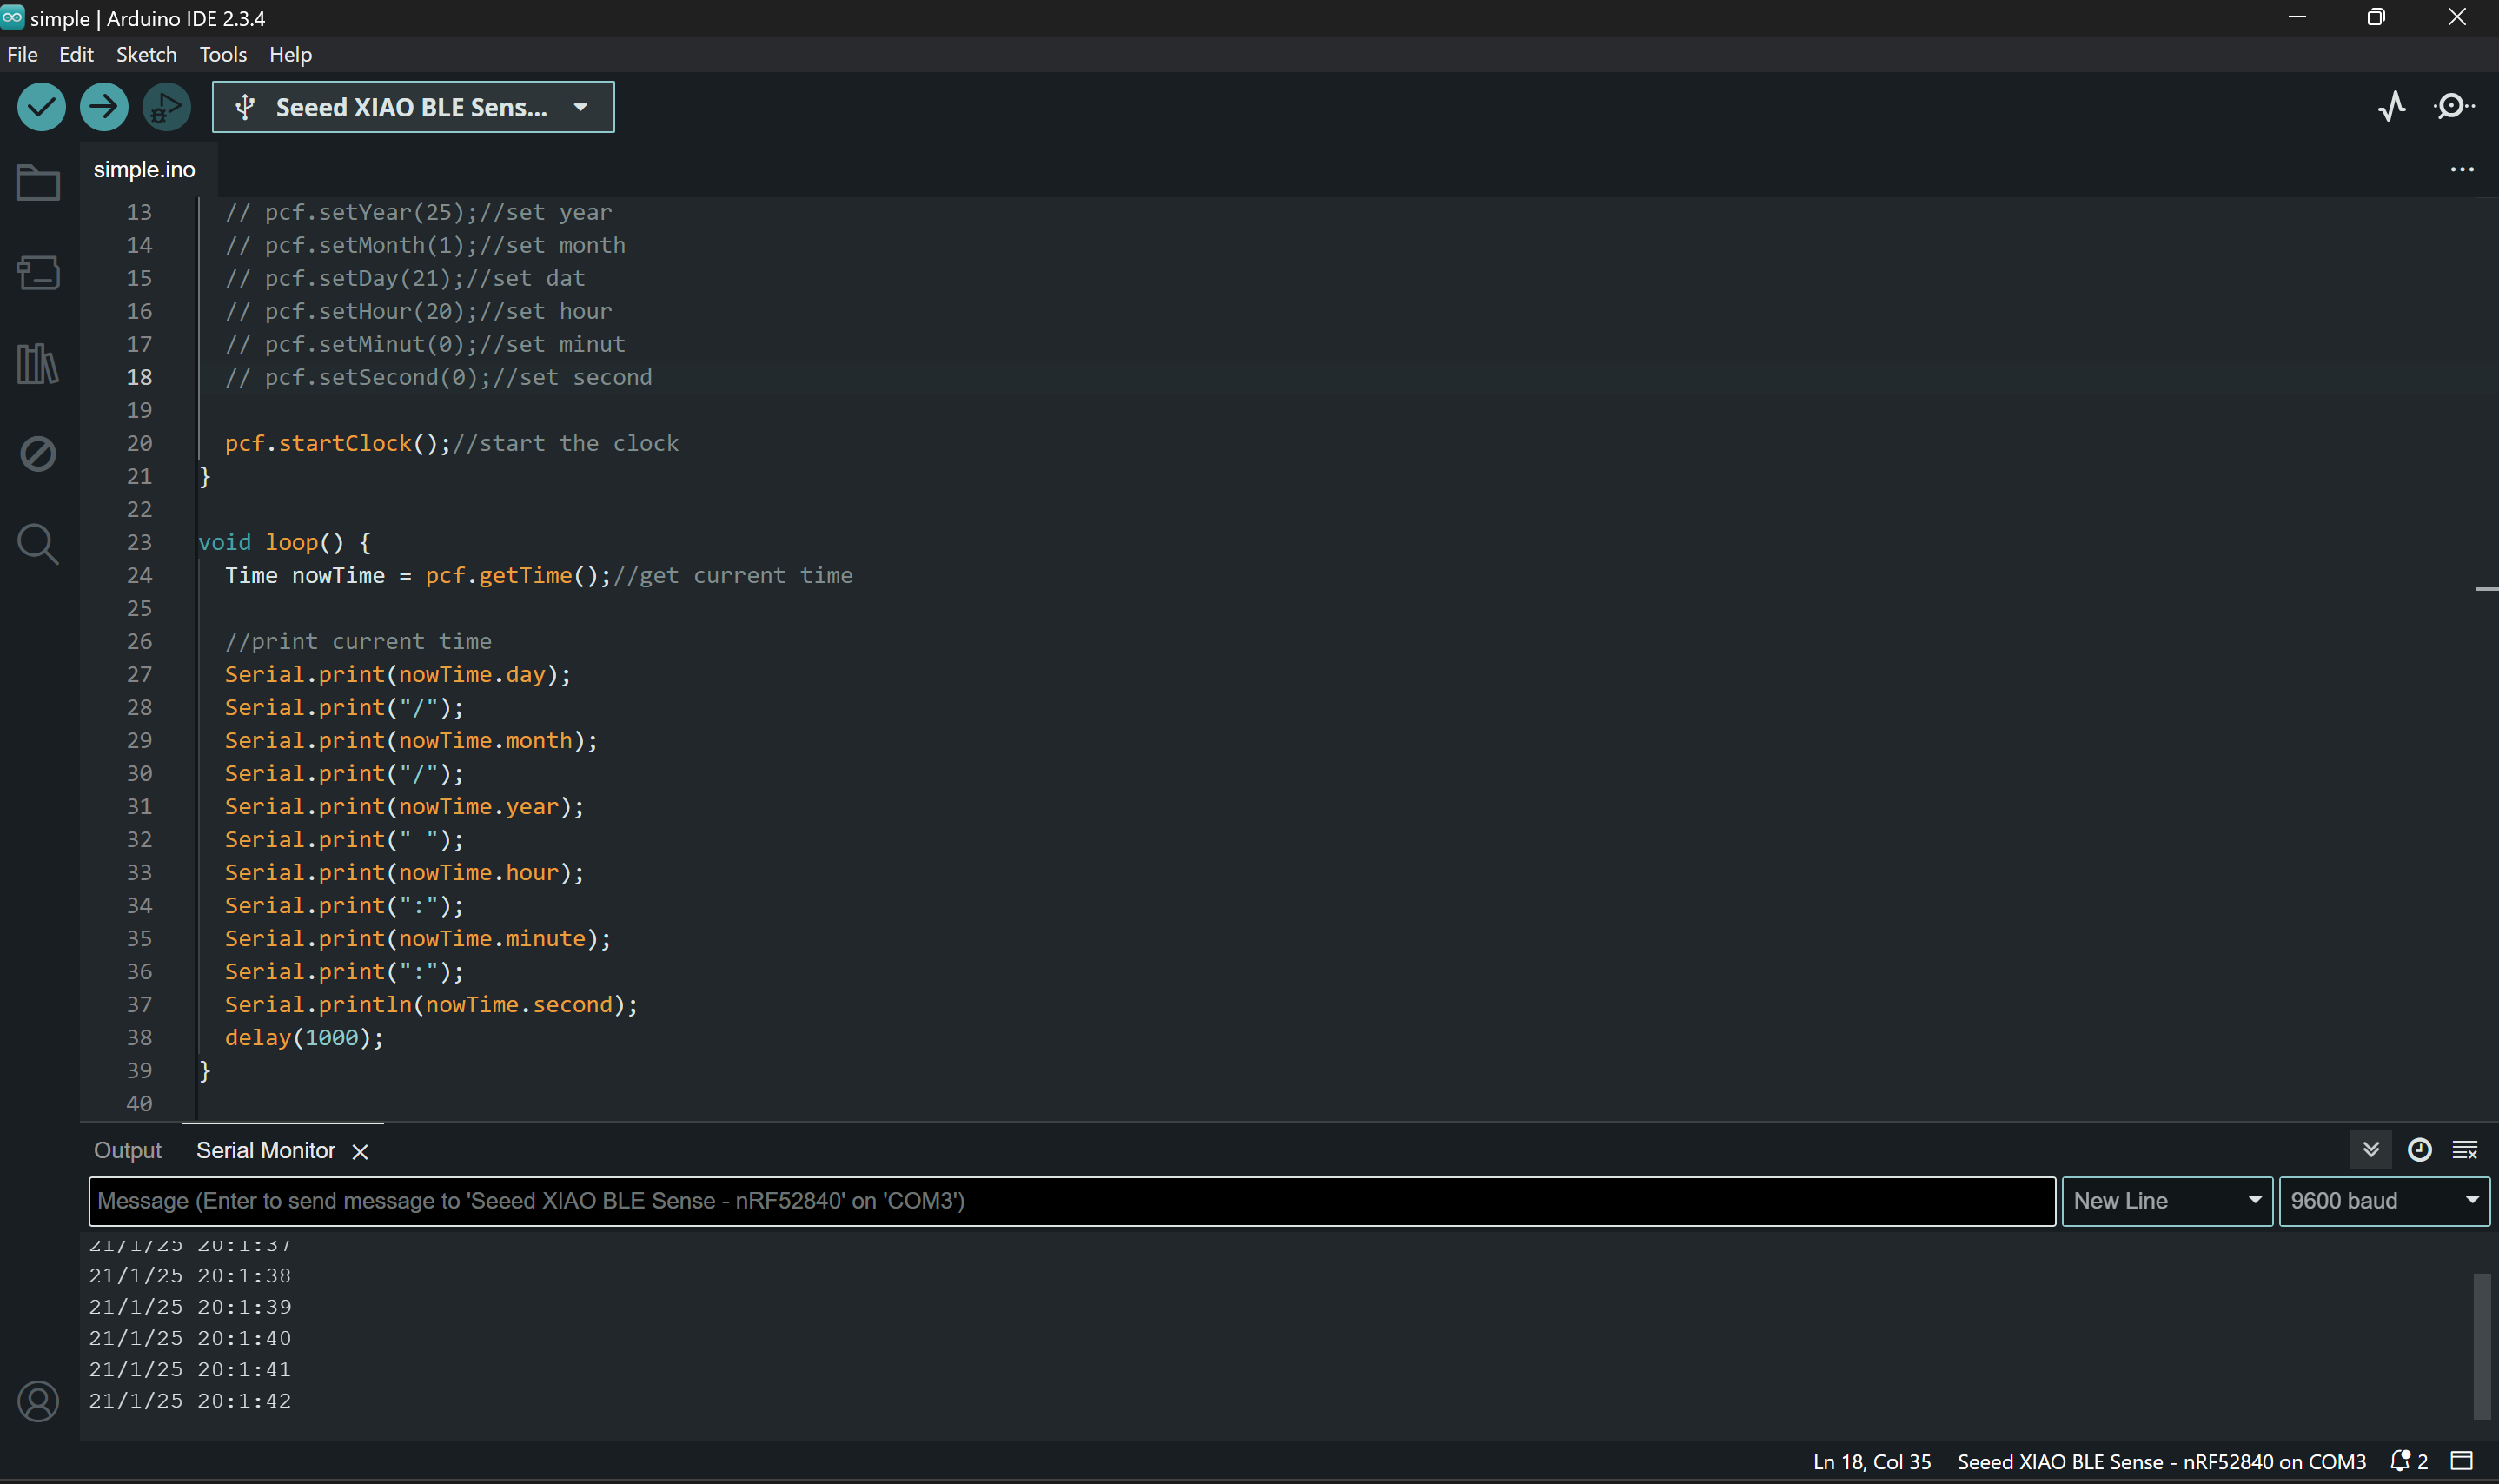
3. RTC (Real-time clock)
We used the code below to set RTC and and we input central standard time (CST). The methods for setting the time were then commented out and the board was flashed again so the time would not reset whenever the device is turned on.
#include <PCF8563.h>
PCF8563 pcf;
void setup() {
Serial.begin(9600);
pcf.init(); //initialize the clock
pcf.stopClock(); //stop the clock
pcf.startClock(); //start the clock
}
void loop() {
Time nowTime = pcf.getTime();//get current time
//print the current time through the serial monitor
Serial.print(nowTime.day);
Serial.print("/");
Serial.print(nowTime.month);
Serial.print("/");
Serial.print(nowTime.year);
Serial.print(" ");
Serial.print(nowTime.hour);
Serial.print(":");
Serial.print(nowTime.minute);
Serial.print(":");
Serial.println(nowTime.second);
delay(1000);
}

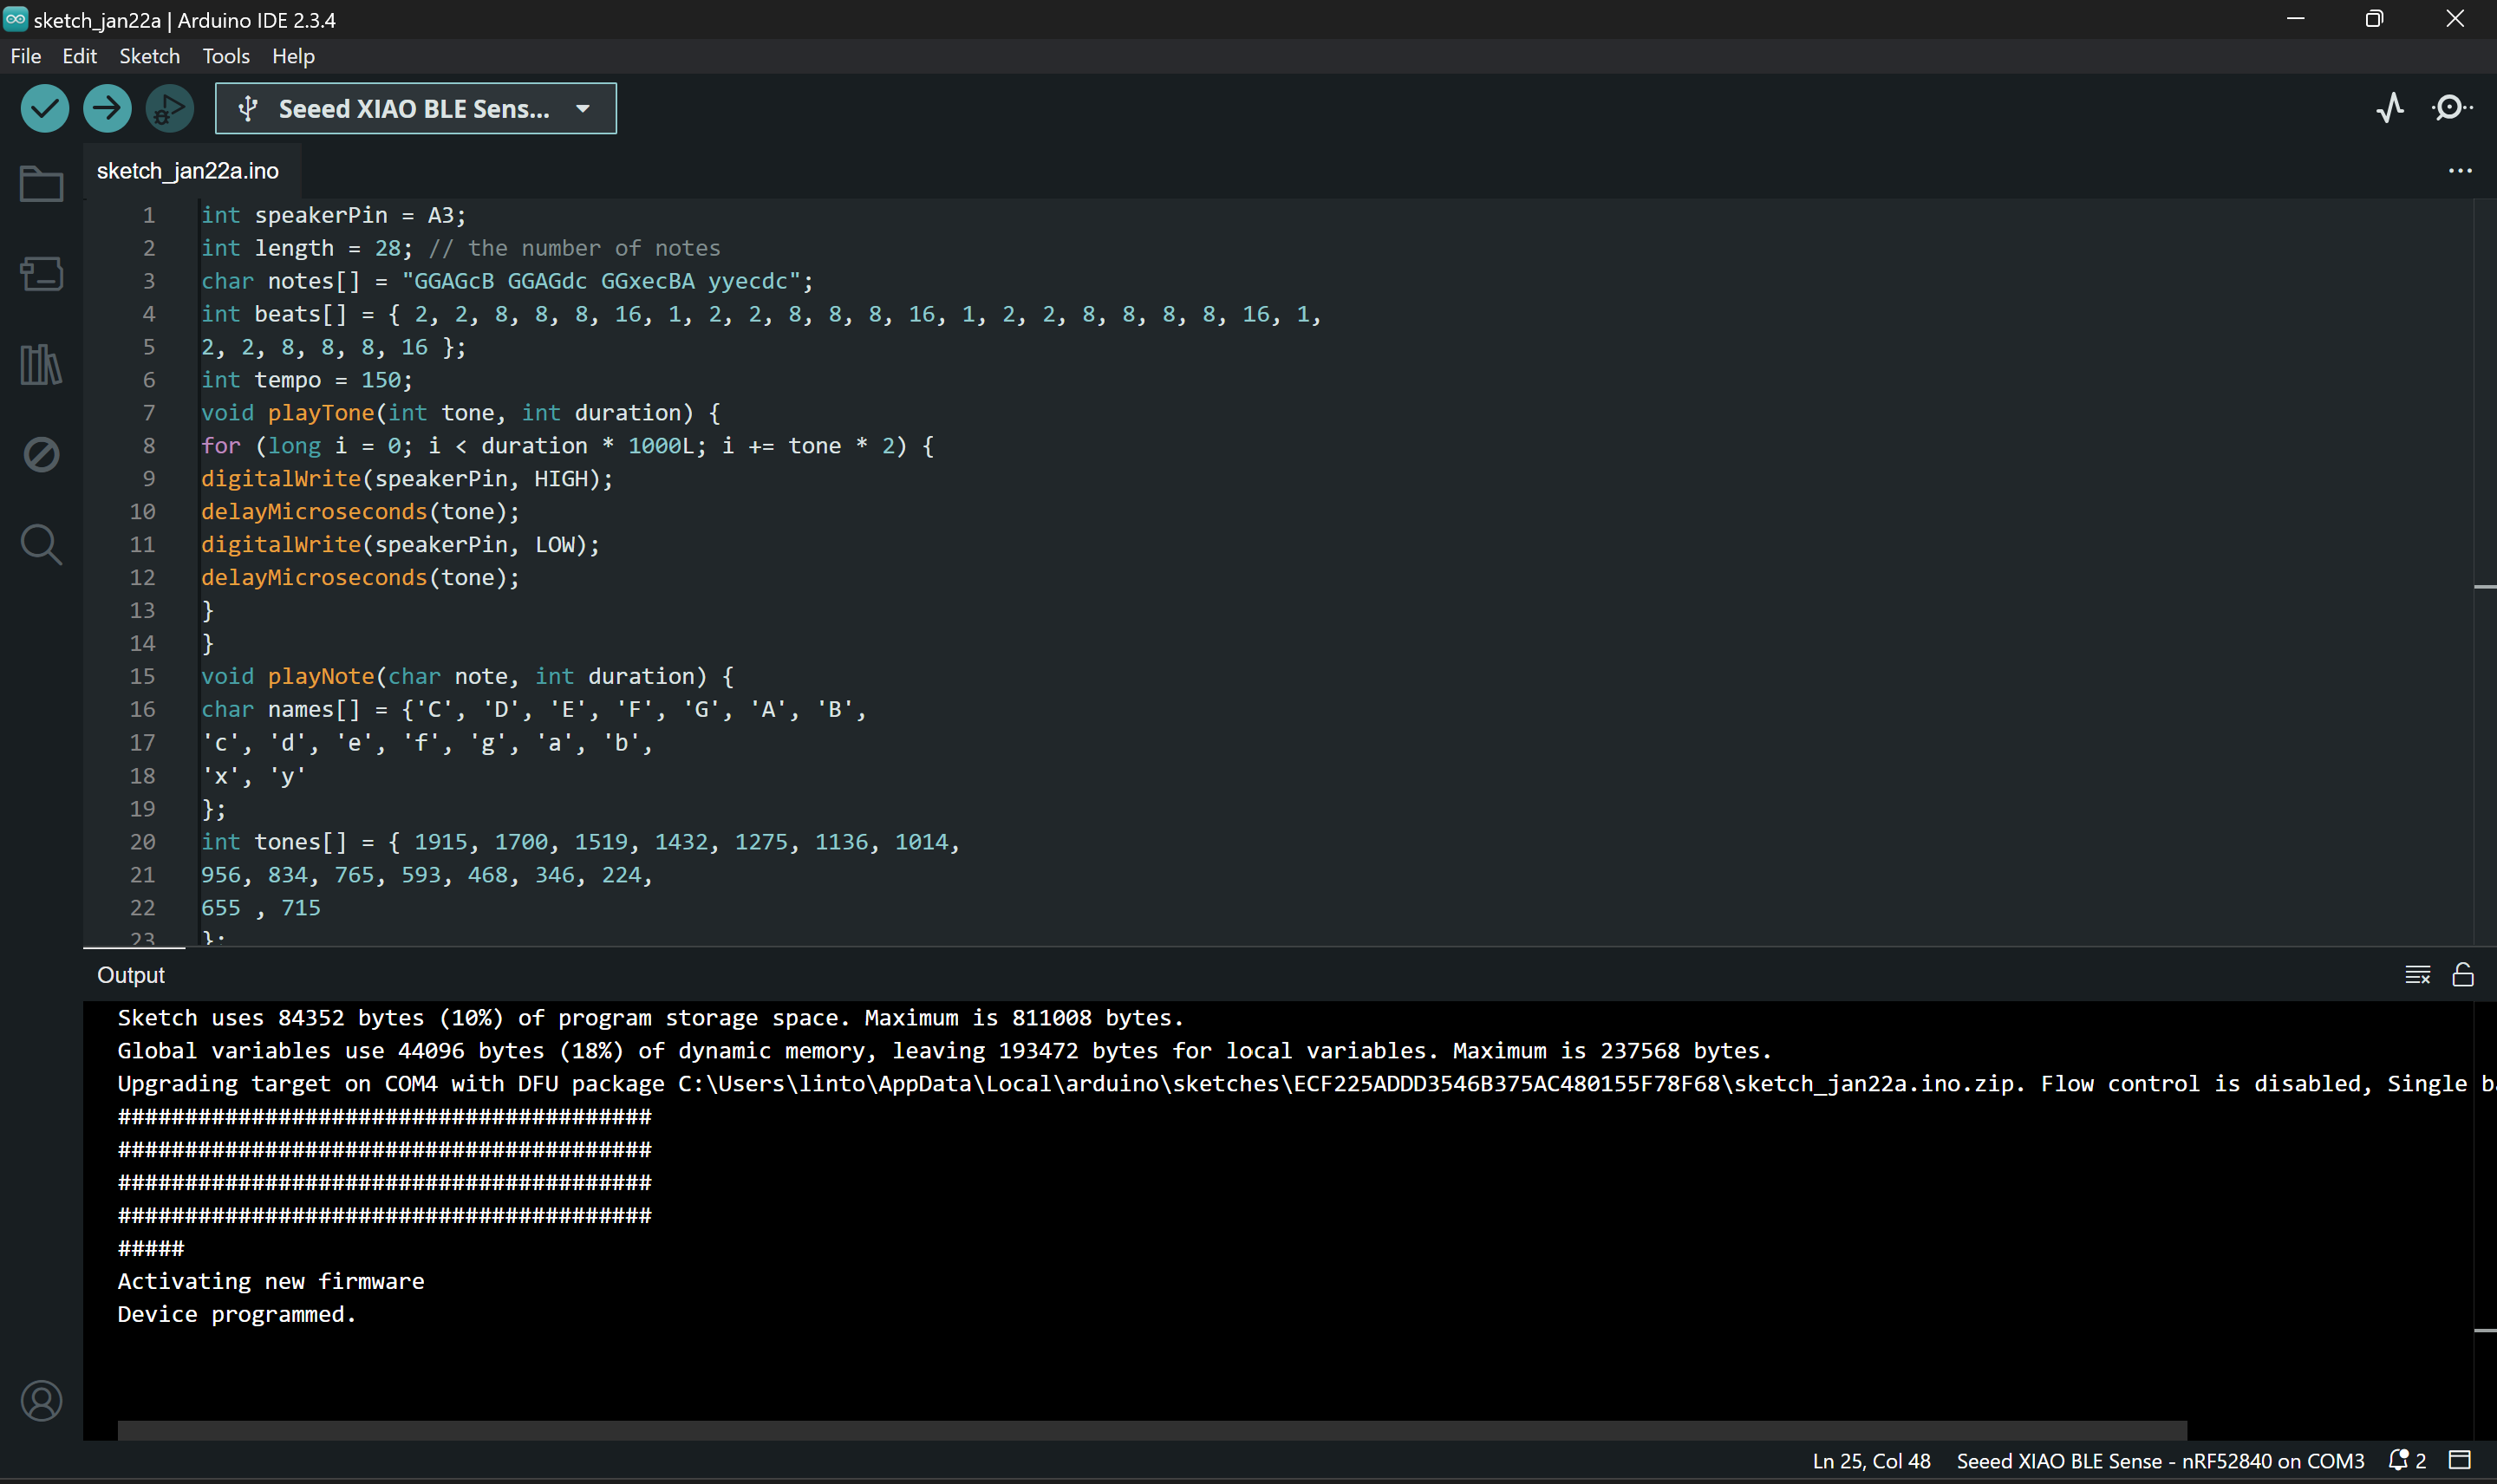
4. Buzzer
Code given below play happy birthday song using the buzzer.
int speakerPin = A3;
int length = 28; // the number of notes
char notes[] = "GGAGcB GGAGdc GGxecBA yyecdc";
int beats[] = { 2, 2, 8, 8, 8, 16, 1, 2, 2, 8, 8, 8, 16, 1, 2, 2, 8, 8, 8, 8, 16, 1,
2, 2, 8, 8, 8, 16 };
int tempo = 150;
void playTone(int tone, int duration) {
for (long i = 0; i < duration * 1000L; i += tone * 2) {
digitalWrite(speakerPin, HIGH);
delayMicroseconds(tone);
digitalWrite(speakerPin, LOW);
delayMicroseconds(tone);
}
}
void playNote(char note, int duration) {
char names[] = {'C', 'D', 'E', 'F', 'G', 'A', 'B',
'c', 'd', 'e', 'f', 'g', 'a', 'b',
'x', 'y'
};
int tones[] = { 1915, 1700, 1519, 1432, 1275, 1136, 1014,
956, 834, 765, 593, 468, 346, 224,
655 , 715
};
int SPEE = 5;
// play the tone corresponding to the note name
for (int i = 0; i < 16; i++) {
if (names[i] == note) {
int newduration = duration / SPEE;
playTone(tones[i], newduration);
}
}
}
void setup() {
pinMode(speakerPin, OUTPUT);
}
void loop() {
for (int i = 0; i < length; i++) {
if (notes[i] == ' ') {
delay(beats[i] * tempo); // rest
} else {
playNote(notes[i], beats[i] * tempo);
}
// pause between notes
delay(tempo);
}
}
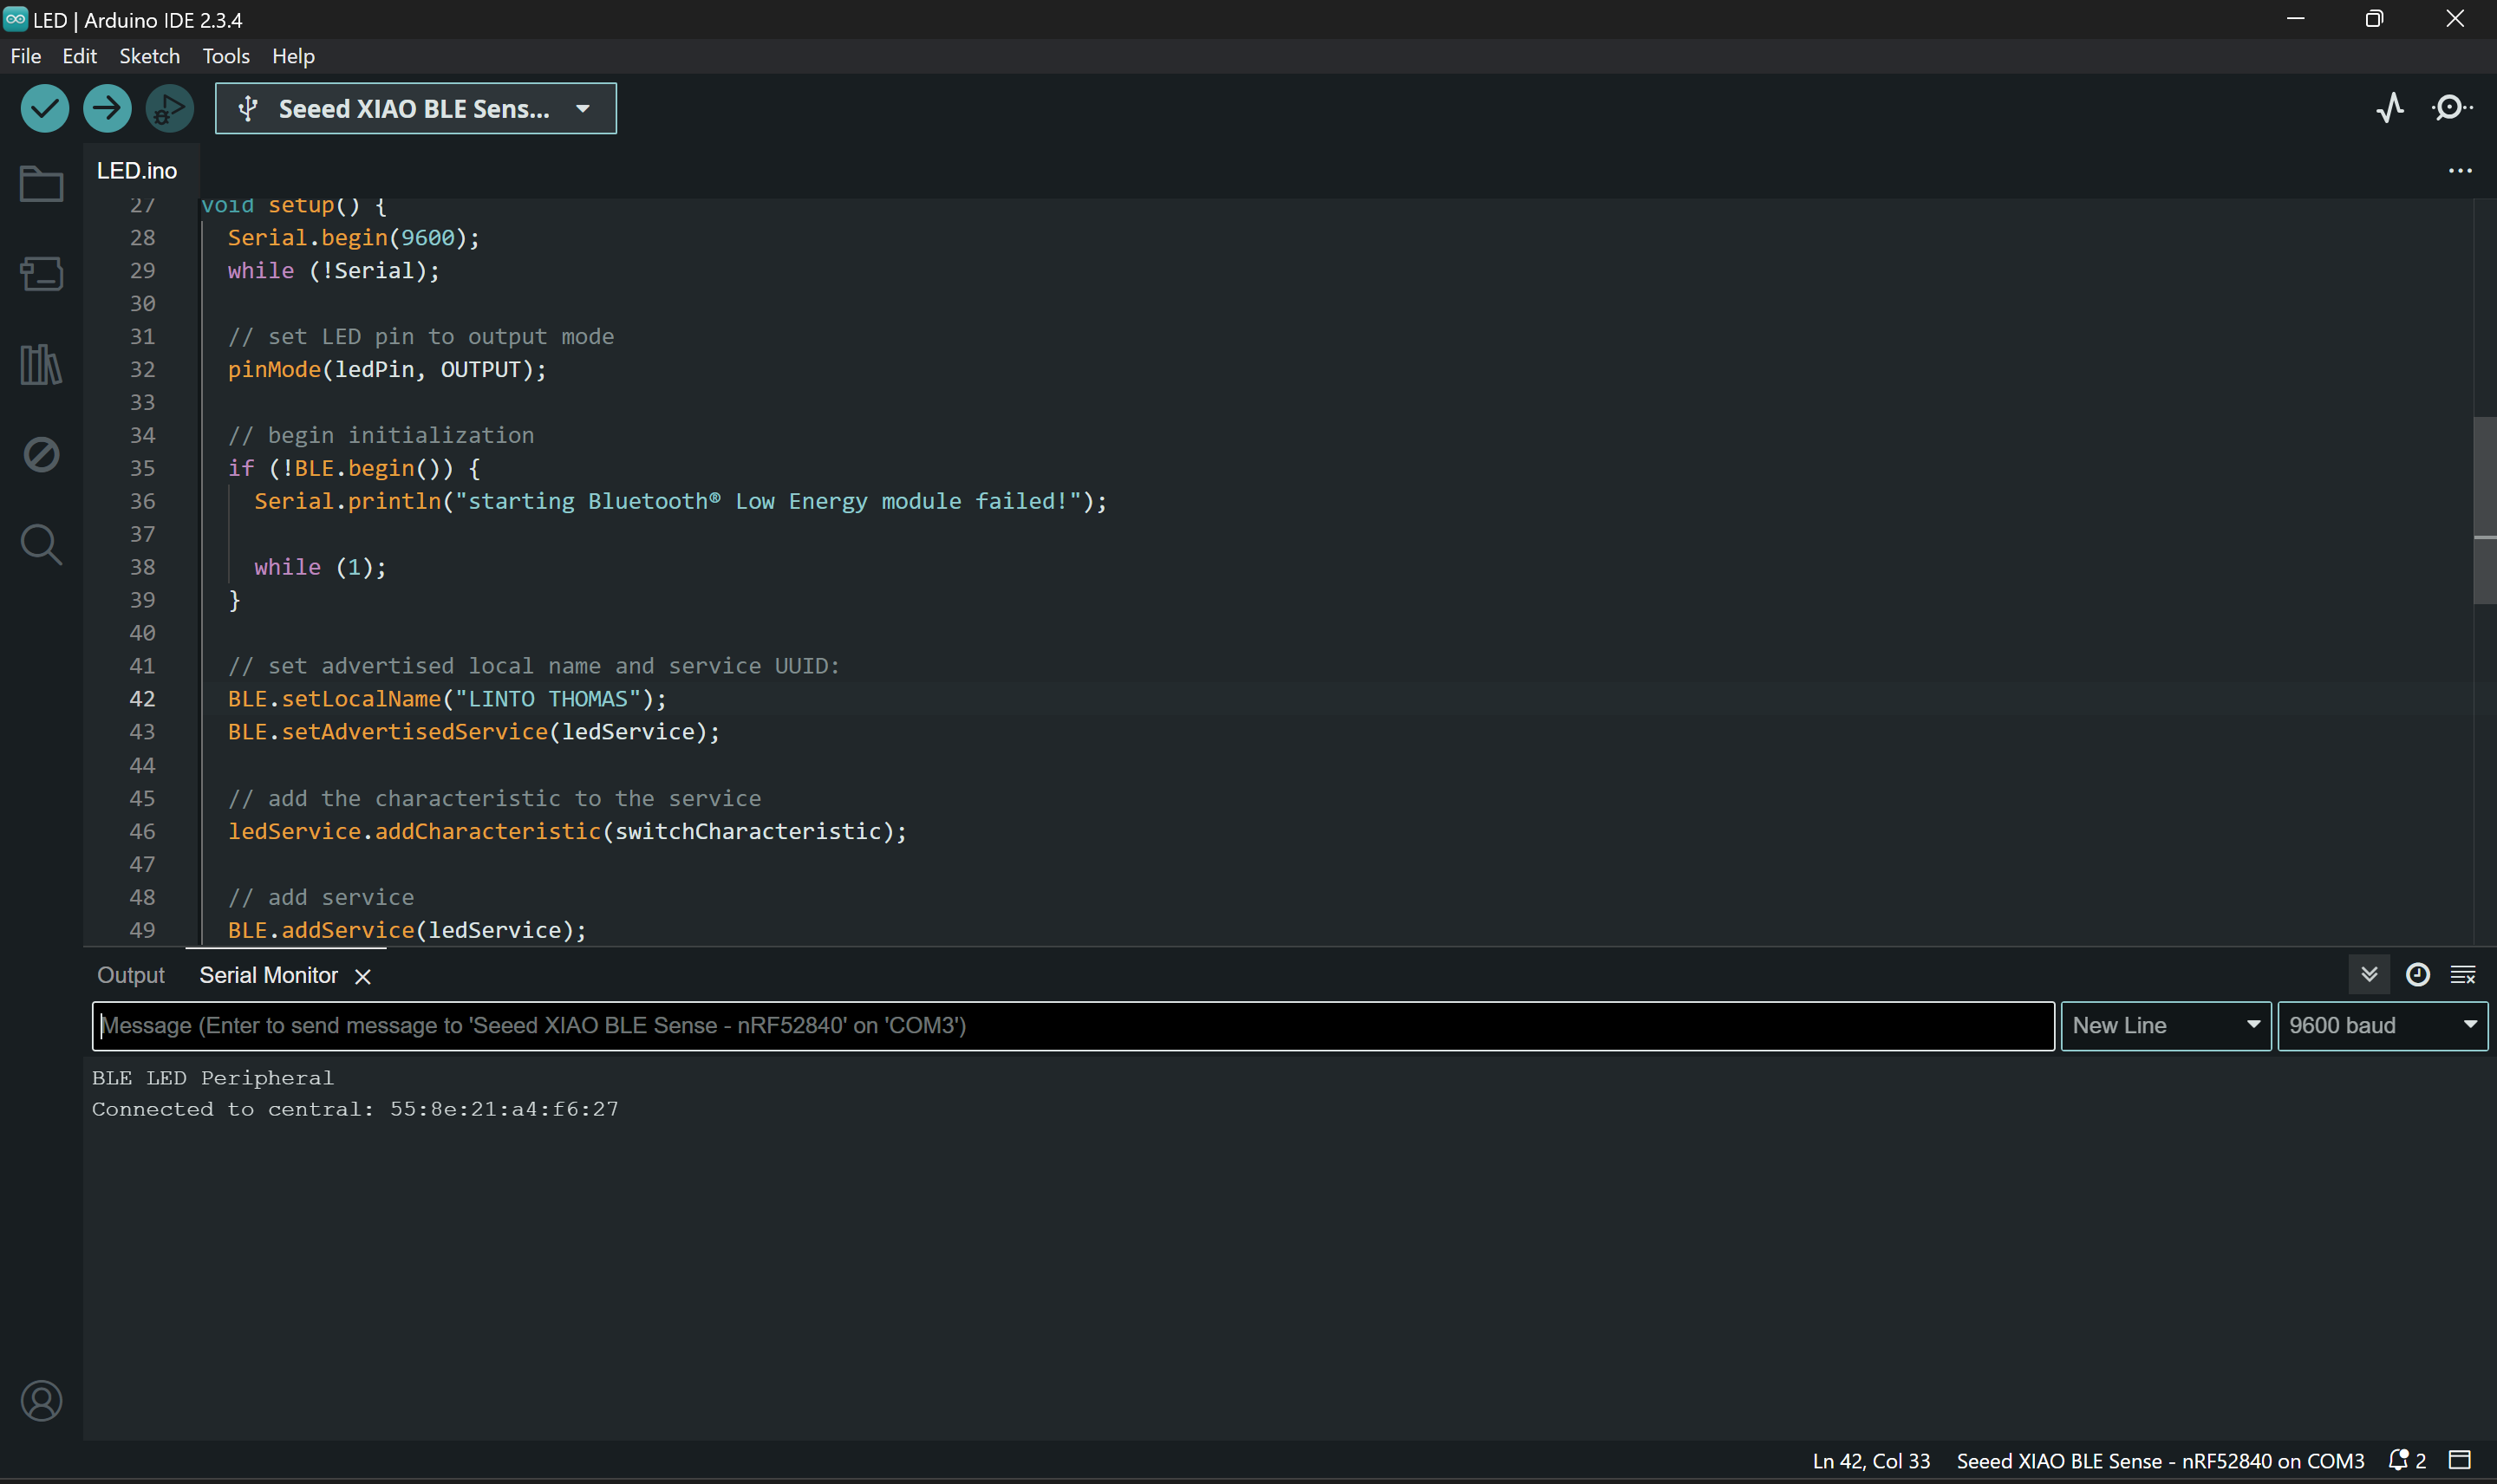
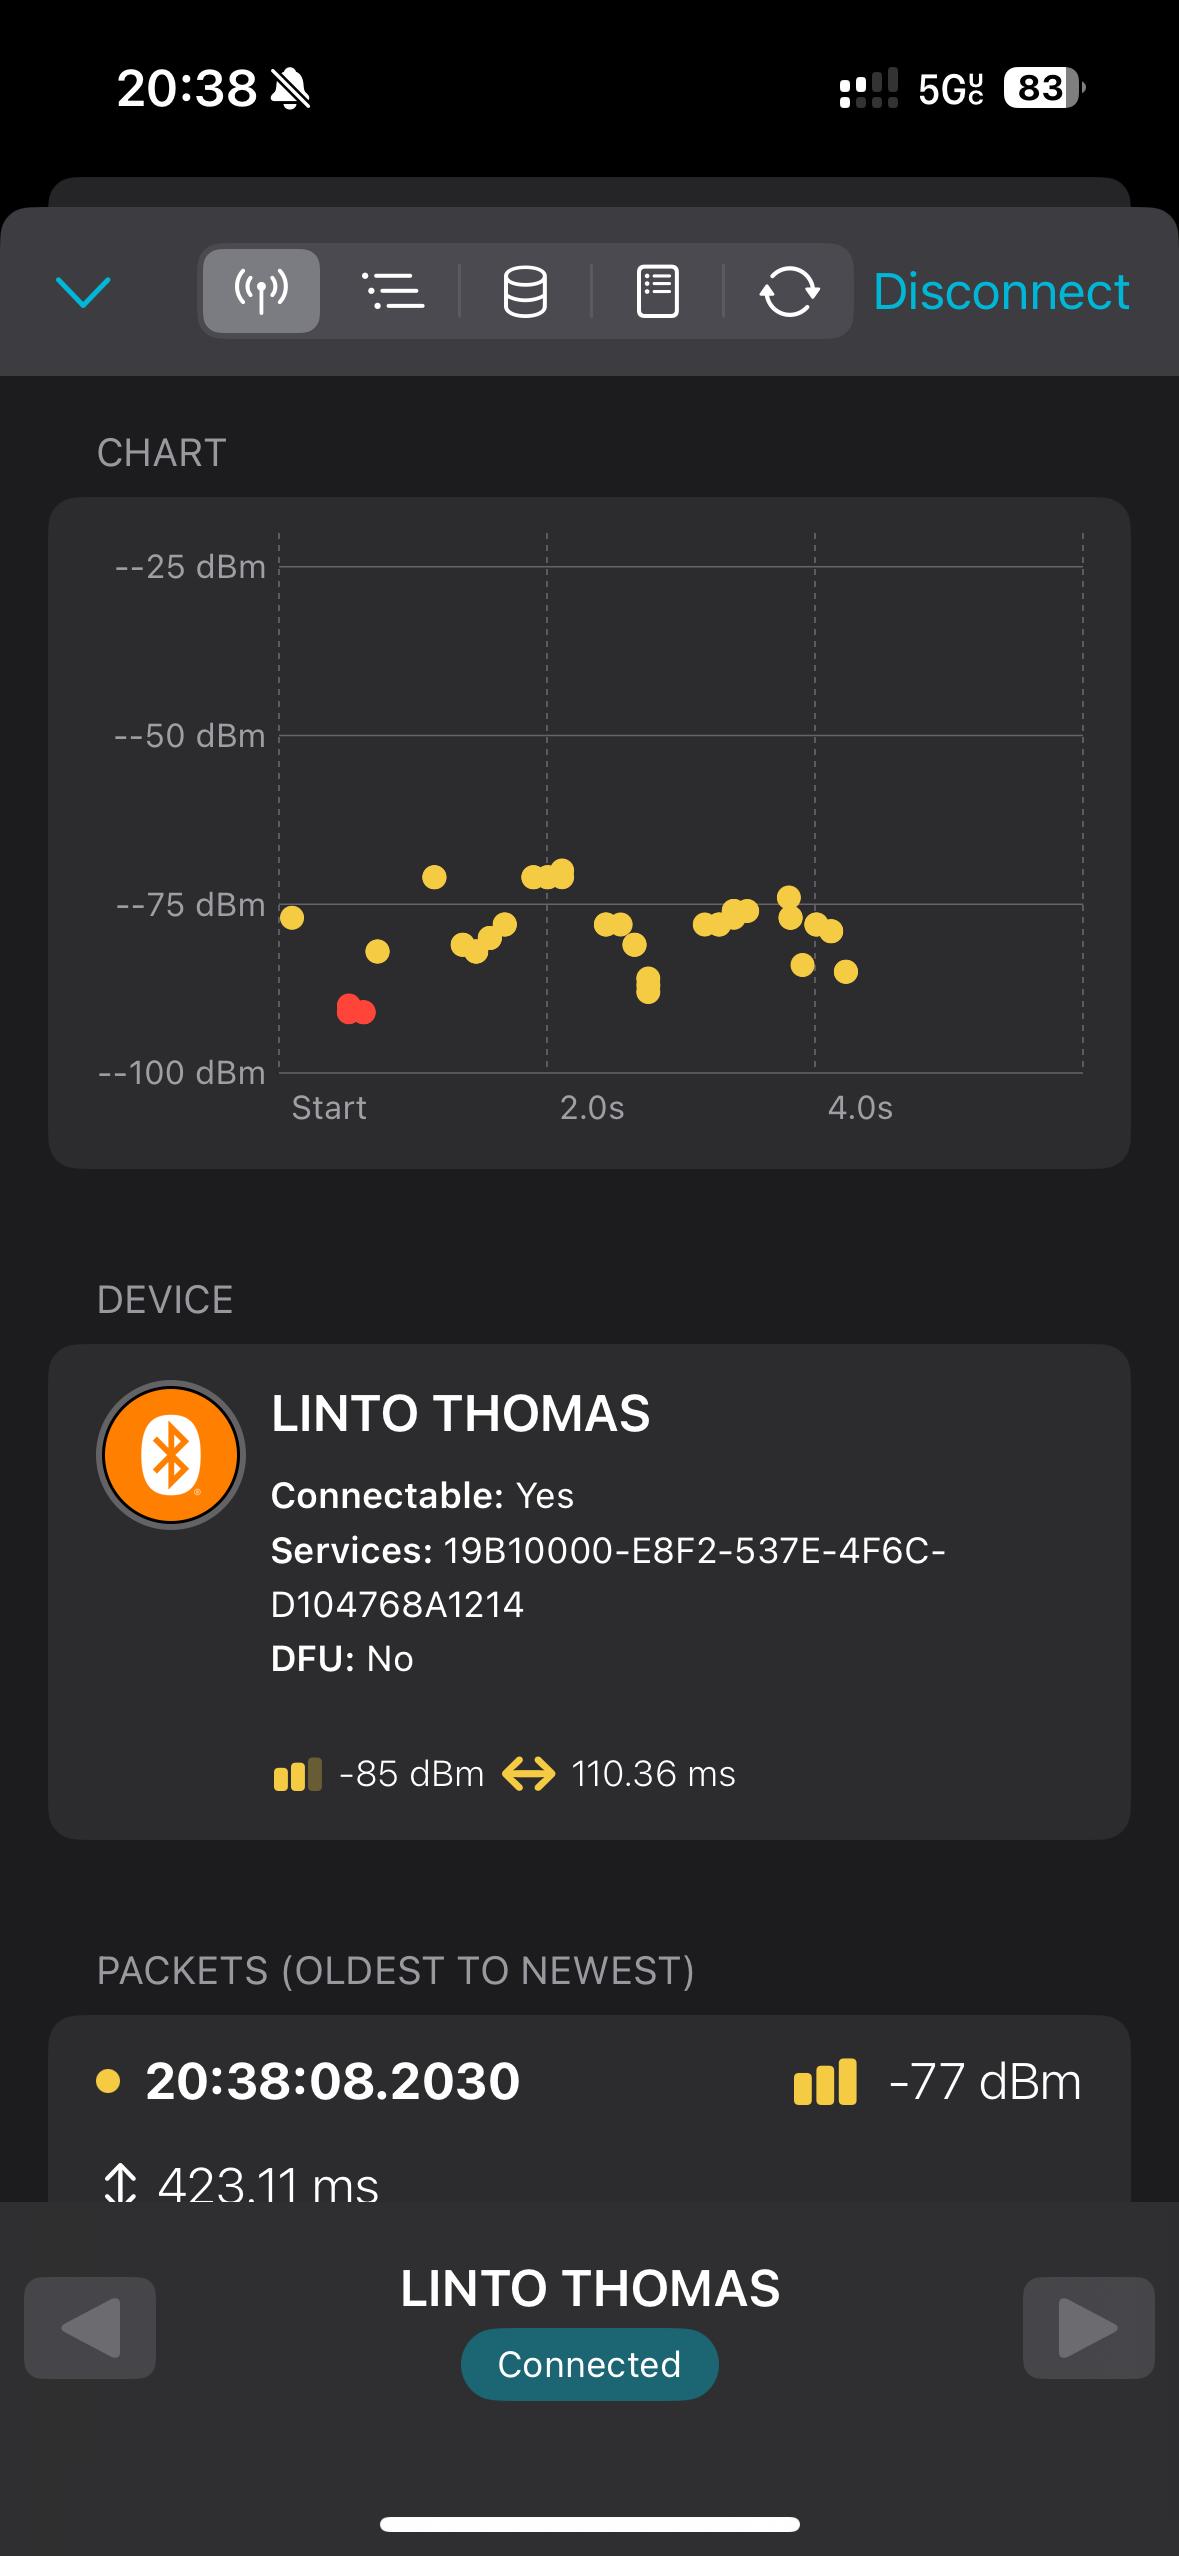
5. Bluetooth Low Energy
We programmed our microcontroller with the BLE sketch and customized the device name to display our chosen name when connecting via Bluetooth.